Create first test
OK, I want my test against my data now.
First, close the project you were playing with. If you did any changes to the project, CAT Studio will ask you whether you want to save the changes.

You will be redirected to Project page.
Create a New Project
Create a new empty project using this button:

From project overview it is clear your project is empty so far.
Add a Data Source
Now you need to add a new data source. CAT needs to know where is the data you are about to test.
You can add a new data source either from Project page or from Data Sources page.
In the dialog for adding a new data source, you will need to provide a few inforamtion:
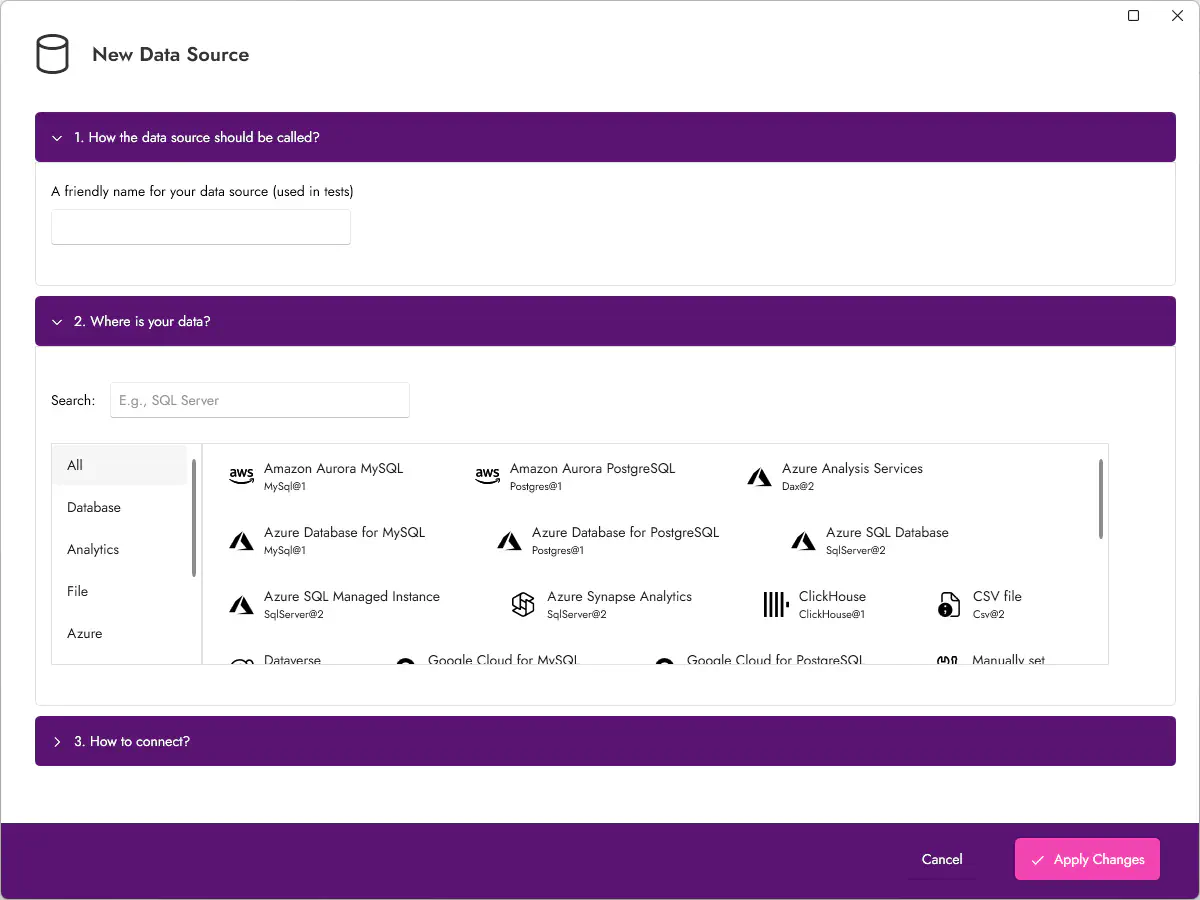
- (1) Name for your data source
- In the first section, provide a friendly name (short but descriptive) for your data source. In the tests, you will refere to the data source by this name.
- (2) Where is your data
- Here, find the technology your data uses, such as Power BI Desktop, PostgreSQL, ORACLE, Azure SQL Database, ODBC etc.
- (3) Connection info
- Based on the technology you select, you need to provide connection details here. At this point, it is worth to check the full documentation.
Automate a Test
Now you have a data source set up. Let’s proceed to the funny part - creating tests. Go to Tests page and click “Add a Test” button. On the right side of the screen, you will see test details with two tabs:
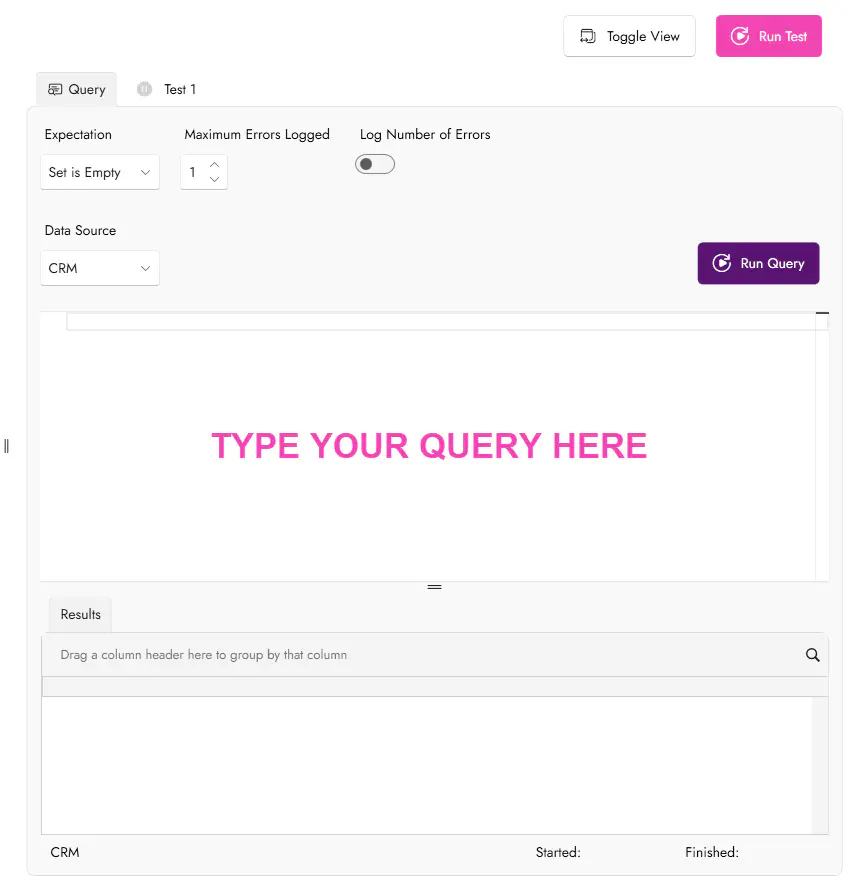
Provide your SQL query that checks your data. You can run the query using “Run Query” button and explore results.
Set the expectation for the result. “Set is Empty” is preselected. When you change it to “Sets match” or “First Contains Second” or “Second Contains First”, you will have to provide two SQL queries. Learn more about expectations here. Based on the expectation, other options become available. If you are just starting with CAT, leave the defaults for now.
Switch to the other tab, named “Test 1” so far. Provide more meaningful name and description for your query.
Run the Test
You test is automated now. Hit the “Run Test” button and see the results. Note that the test results are on the second tab. You can also display both tabs side-by-side with the “Toggle View” button.
In this introduction, you learned how to install and use CAT Studio. You created and ran a sample project and you created your very first test. What now?